Blogs have become commonplace on the Internet. They're an easy way to publish multiple articles in a standard format.
Readers can subscribe to an RSS of your Blog and will be notified by their RSS Reader when you add a new post.
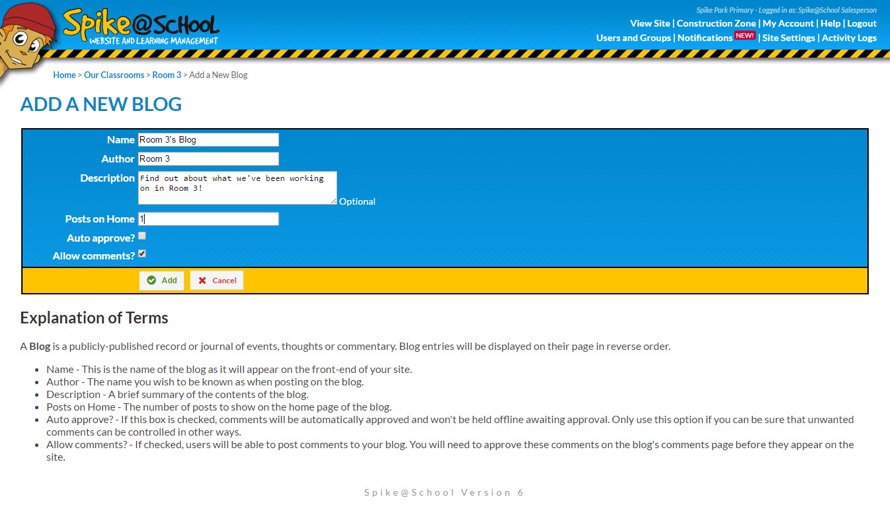
You can add a Blog by choosing Blog from the ‘Add a New’ menu in the Construction Zone. You'll get this page:
Creating Blog Posts
A Blog has an assigned author and you can optionally allow people to comment on your Blog posts. You can also choose to approve comments before they will go public on the website. Additionally, you can specify how many Posts will appear on the Blog’s home page at a time.
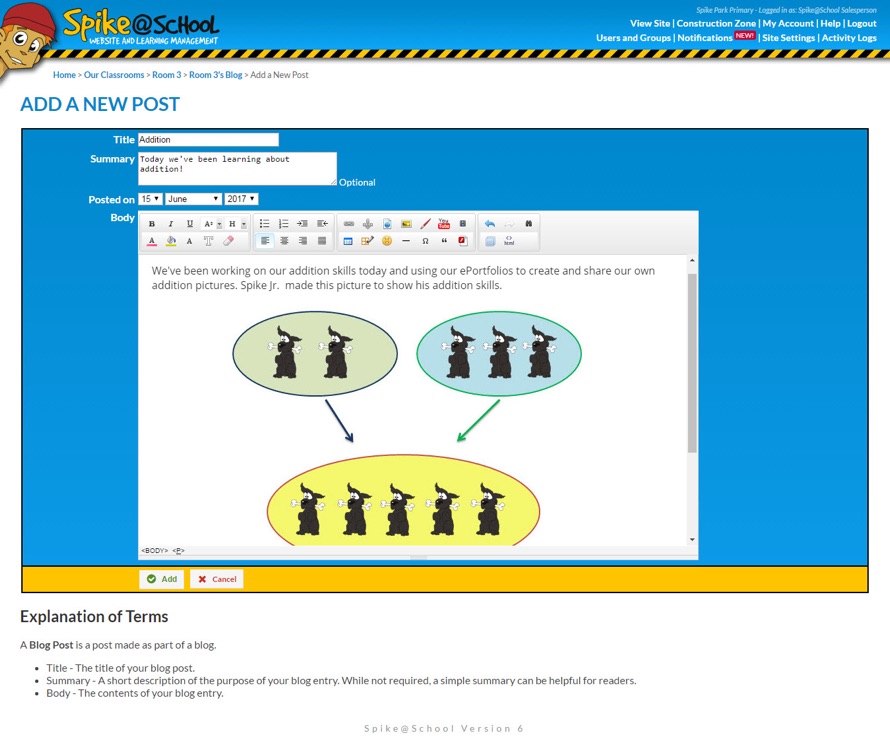
Once you've set your specifications and added your Blog you can add a Post. As you can see, the editor for a Blog Post works just like the editor you use with a Page. Give your Post a Title, optional Summary and add in some content. When you're ready to publish your Post, click ‘Add’.
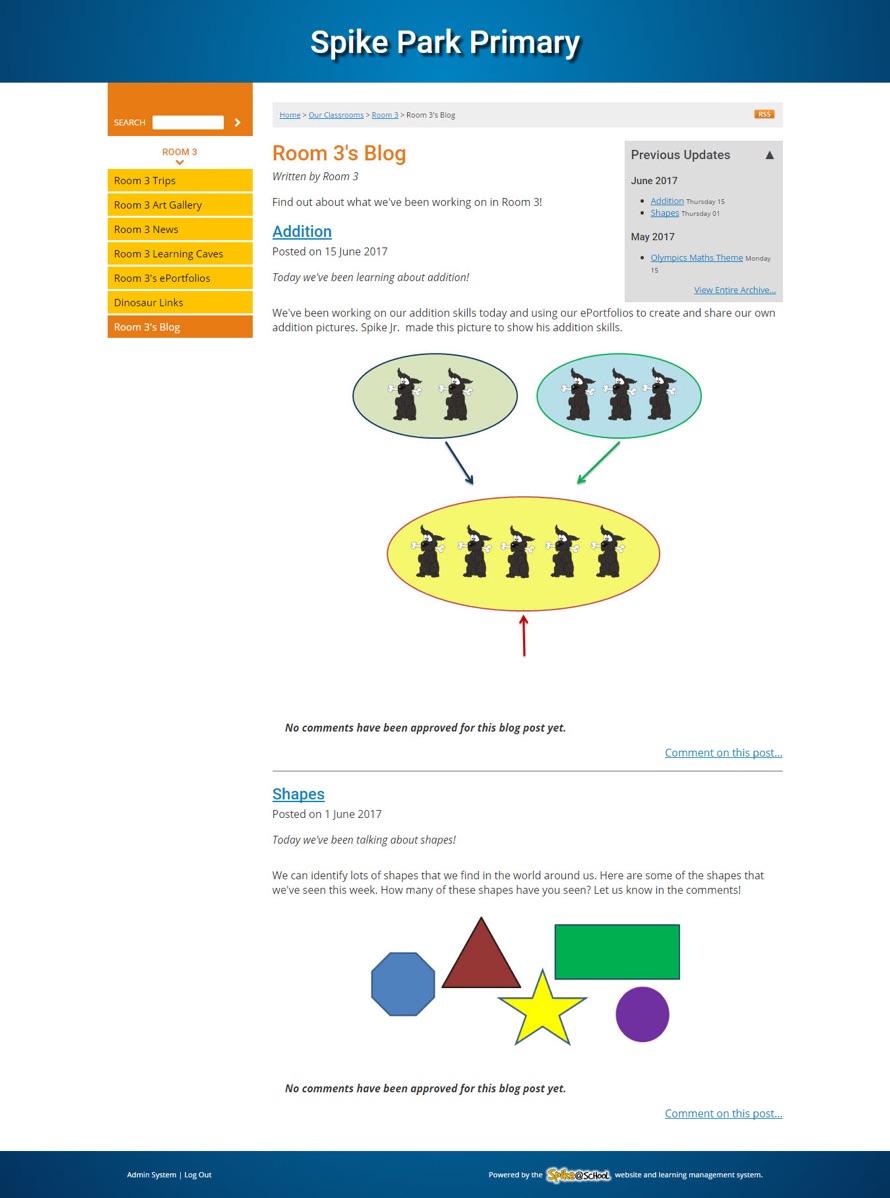
You can then check out your Blog Post on the website. I've added a couple of Blog Posts so you can see that it shows the latest post when you first visit the Blog. You can view old Posts by clicking on the arrow beside ‘Previous Updates’.
Adding and Moderating Blog Comments
If you've chosen to allow comments you'll see a Comment Submission Form appear below your Posts. This can be a useful tool for students, friends and family to interact with the Blog. I'm about to leave a comment on the Shapes Post that I made.
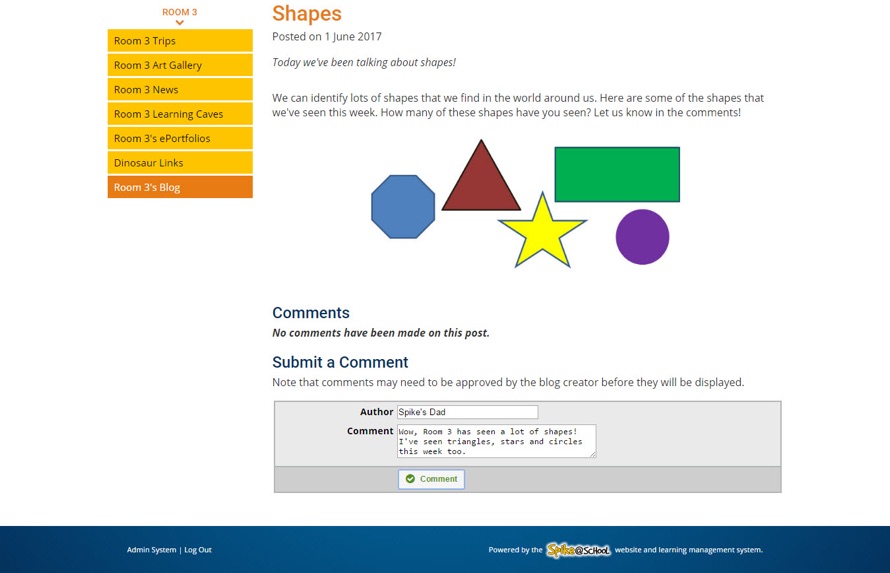
Now let's return to the Construction Zone to manage the comments.
Here we can quickly see which Posts have comments that are awaiting our approval.
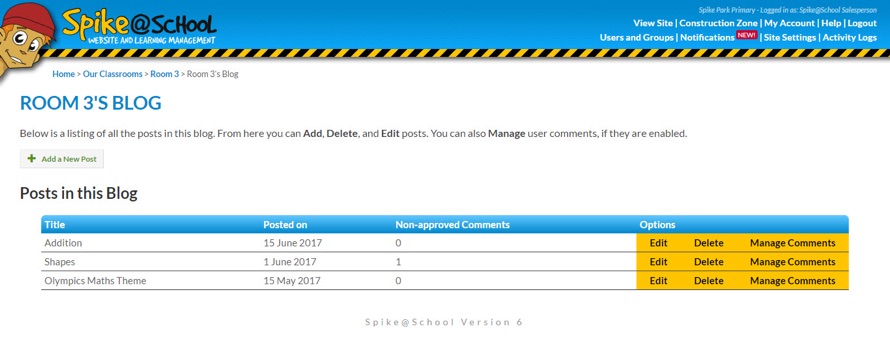
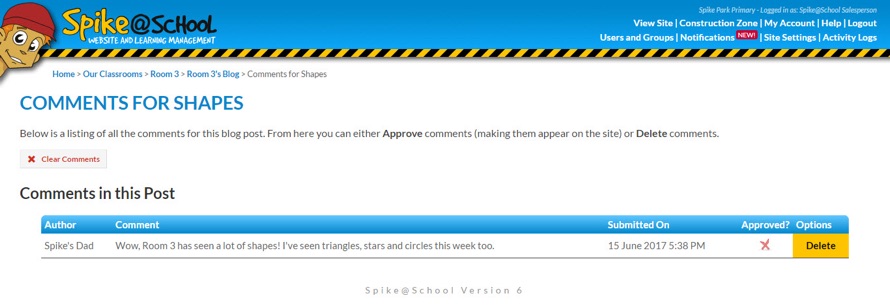
We can then click ‘Manage Comments’ next to the applicable Post to view and approve them. To approve a comment, just click the cross to turn it into a tick.
Our comments then show up underneath the Blog Post on the website.
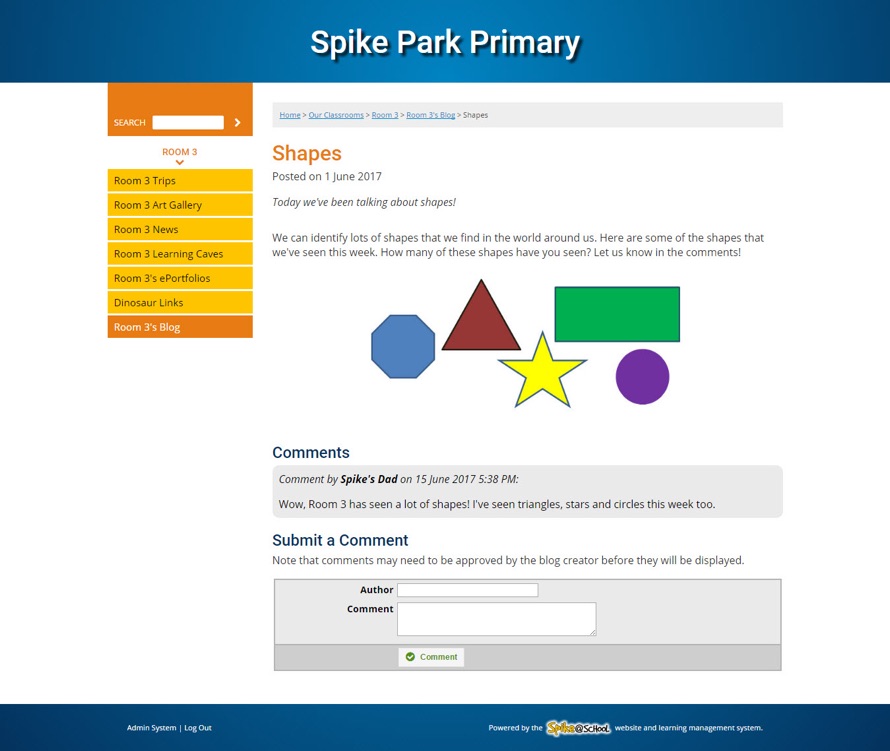
So as you can see, Blogs are a great way to keep in touch with your audience and encourage some dialogue.
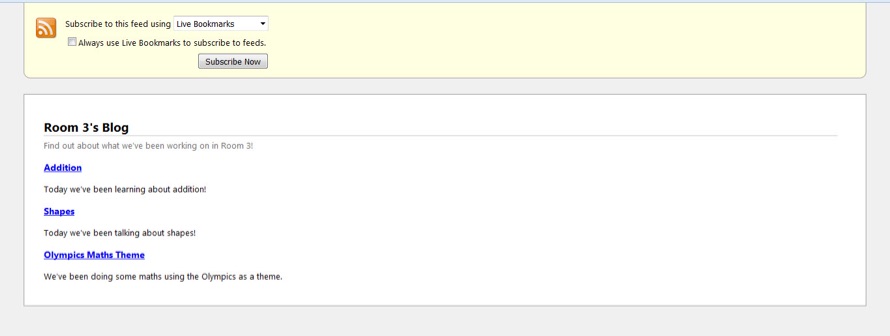
Finally, here's what the RSS Feed looks like when viewed in Firefox:
